Showing posts with label sew along. Show all posts

Sunday, February 15, 2015

Free Penny play suit turns knit dress

Frances Suzanne are the organizers of "Flip this pattern". I love the concept, everybody who is sewing along starts with the same pattern but you are encouraged to tweak it in your own way. I have seen very creative and inspirational results, but I have never sewed along yet. This month is "Free for all month", which means that there is not one pattern, but every free pattern or tutorial out there. This was a month that I had to participate in.


The pattern I chose to flip is the Penny play suit from Shwin & Shwin. I love the curved arch contrasting two different fabrics. The lines of the Penny play suit resemble the line of the Meggie Mae dress (designed by one of the Shwin sisters). The dress has covered shoulders but you do not have to sew sleeves. The Penny play suit is a free one size pattern. The pattern is supposed to suit a 12-18 month year old. The pattern is intended to have the upper arch in woven fabric and the lower part in jersey.


I flipped this pattern into a dress for my middle daughter. Knits require a bit tighter pattern than wovens and I guessed that the Penny play suit 12/-18 month woven top would approximately fit my three and a half year old in knit. I was almost right, it wasn't approximately, the fit was spot on. I put the top piece on the Princess Castle pattern (Ottobre 3/2013) that I used earlier this week and it fitted exactly, mental high five to self.


I turned the pants part into a skirt part by combining the upper arch of the trousers with the skirt part of the Princess Castle dress. Finding the right angle was a bit of a challenge but it worked out. I omitted the zipper because this is not a necessity with knits. I lined the bodice part with the same knit. I added the side seam pockets from the Fawn Lily dress and I also used the folding technique I learned when making that dress to neatly finish armholes and neckline in case of not using a split back piece.


I constructed the dress for 90 percent with my lock, only the bottom hem and gathering was done with my sewing machine (I know I could gather with my lock, but I prefer to do it one my sewing machine). I did not gather over the entire arch, I left a few centimeters ungathered on both sides. The gathering is great for my toddler (decreasing) remaining baby belly. For the hem I used my double needle with two different color thread for the bottom hem.


The fabrics are both from the frog prince line of Lillestof, so no creative pairing there. The hair piece I crocheted two years ago but is not usually worn because it is a bit heavy.


When I made the first pictures my daughter was holding is a very awkward position, then I realized she had seen big brother photo shoot and wanted the same picture as he had got. She tried to put her plush toy on her shoulder herself.


I love to hear what you think of my creations. Feel free to leave a comment in the language you prefer (although Google translate might have to assist me if you choose something different than English, German, Dutch or Hungarian).  

Sunday, October 5, 2014

Project Run and Play: Signature style


I made it! I sewed along for  Project run and play all four weeks! It was very fun to do and I recommend everybody (who is not doing it yet) to do it next time. Looking at what others came up with is even more fun if you have tried yourself as well.


Well week four, signature style. I do not feel I have a sewing style, I also do not have a clothing style in general. I therefore decided on sewing my son a coat. That way all my kids would have received an outfit over the course of these four weeks. The coat would have come from Ottobre (which is my go to sewing magazine) and the coat would have been lined jersey (my go to fabric).


But then I saw this pin. I saw that it was a sleeve (of course) but I immediately thought neckline. I am a huge fan of children cloths that my kids can put on and close themselves. Besides saving time in the morning before school my kids prefer to be able to put on their cloths alone after gym as well. This is also why I loved the front of the dress from Big dill that inspired last weeks dress. I bought (and sewed) the Lilly Fawn dress because I was intrigued by the promise (and delivery) of a zipper/button free woven dress. Back to the pin of a sleeve that screamed neckline to me. I realized that a reversed tulip sleeve kind of neckline on a woven fabric dress should make it possible (for my eldest who has a totally square torso) to put on the dress without extra opening.


I started to draw something myself but quickly returned to my computer to restart pattern search. I searched on shawl collar and enter the Bimaa sweater. Many versions had passed me by and I already gotten the impression that this pattern should be something special but until that moment I hadn't seen it. For those few people that like me until a week ago have not given the Bimaa a close look, the Bimaa is a jersey pattern supporting three different collars. One of those collars is a shawl collar that perfectly fitted my plan.

I used the six year old collar version and made it slightly higher (a fix part of "my style" would have to be adjusting the pattern at least slightly). I took a general bodice I had lying around and paired it with a Lotta skirt. The Lotta pattern had been on my do to pile too long already, I love the pockets! I opted for a sleeveless version to make the likelihood higher that my daughter can put in on herself (in the past I had learned that small zipper and sleeveless dress pair well, small zipper and sleeves do not). Trying something new is something I love (can that me part of a style as well?) and I decided to go for pipping.


After last weeks success with making my own bias I assumed that making own pipping would be just as easy. Unfortunately, I had not realized that the seams in home made pipping (which did not bother me with bias sewing) complicate the sewing process of pipping significantly. I used my blind zipper feet which went okay in general (I made my own pipping thread by turning some thin yarn into a heavier thread, and I should have put more effort to make it a clear edged thread) but the blind zipper feet lost its way a bit when he met some seams. I probably should have also read up more on pipping before I started sewing this week (and not just relying on my memory of what I had read in the past). Long story short, the pipping is not as it should be, but lets label it "my style", I am not great in the small details.


The brown fabric is from Birch and both the facing and the fabric I used for the pipping are from Robert Kaufman. I bought a fat quarter pack a while ago and had not used it yet. The fat quarter contains all kind of gold fabrics that my daughter loves.


This long story has a happy ending, the dress fitted fine and (although she might have to practise a bit) it is possible to put the whole thing on by an almost 7 year old alone. To sum up my style: last minute change of plans, pattern mash up, not perfect finished, to me a new technique, un-ironed, zipper/buttonless, twirling dress with pockets.


Friday, October 3, 2014

Marcel Marlier sew along

I confess, I have no memories of children books from Marcel Marlier. Although I am from the Netherlands (next to Belgium) I do not have fond memories from my childhood, but I have nice memories from last week, that also counts right? Last week I came across the "I [heart] Marcel Marlier Sew Along" from Sewpony and StraightGrain. The theme of the sew along are the drawings from Marcel Marlier, and what a great theme it is! It is amazing that he drew so many detailed girl dresses. I have spend over an hour roaming the web for pictures.


My middle daughter is in need of some new dresses so yesterday I picked my favorite picture (which may or may not be inspired by the fact that I had matching fabrics). I used a combination of knit and woven cotton. I love knits, they are so easy to wear, but the dresses that make me drool are usually from woven cotton. Pleating for example looks much better with woven fabrics than with knits. The "original" front of the dress has diagonal pleated stripes which I mimicked with knit by creating diagonal seams. I first made the seams and than cut the front bodice. I misjudged the amount three times, if you are doing something similar be on the safe side and use a big piece to start from.

Because "winter is coming", I decided to go for longer sleeves.


I have some patterns for woven collars, but all of them had an opening on the front. I therefore drew something by hand. The result is far from perfect but it works.  I only added the collar on the front to avoid the need to add a zipper or buttons on the back. The neckline can still stretch from the back, which enables pulling over the head.


Sunday, September 28, 2014

Project run and play: Denim

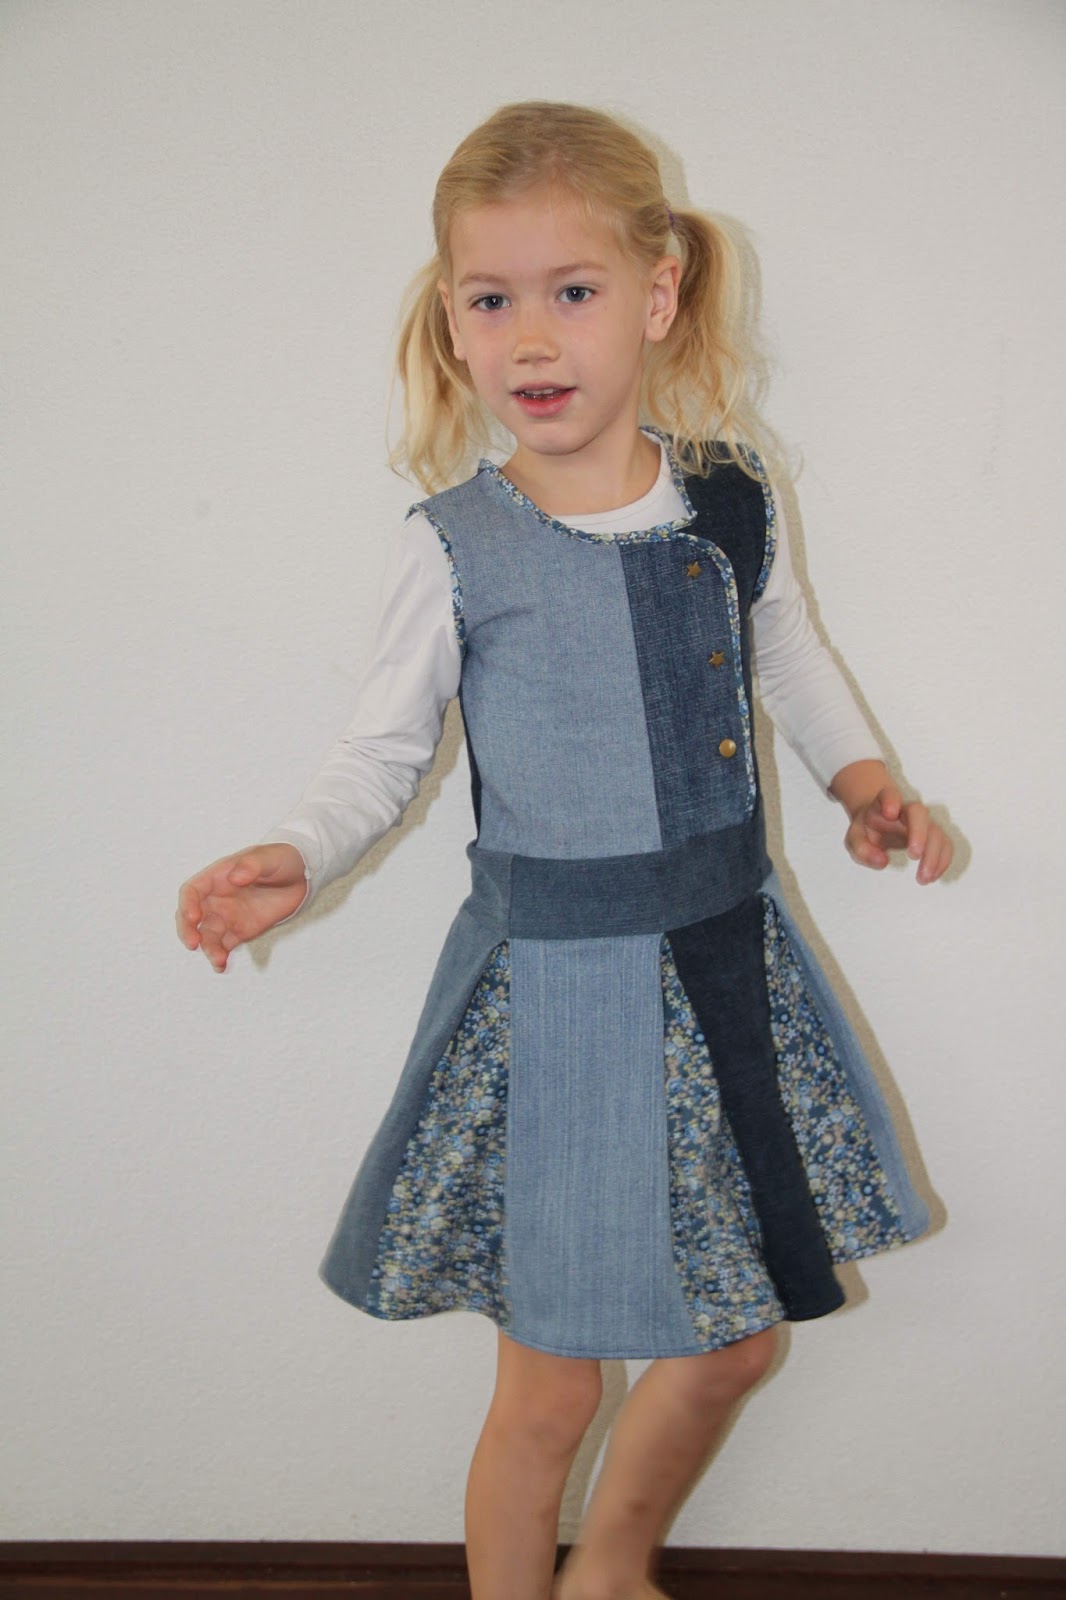
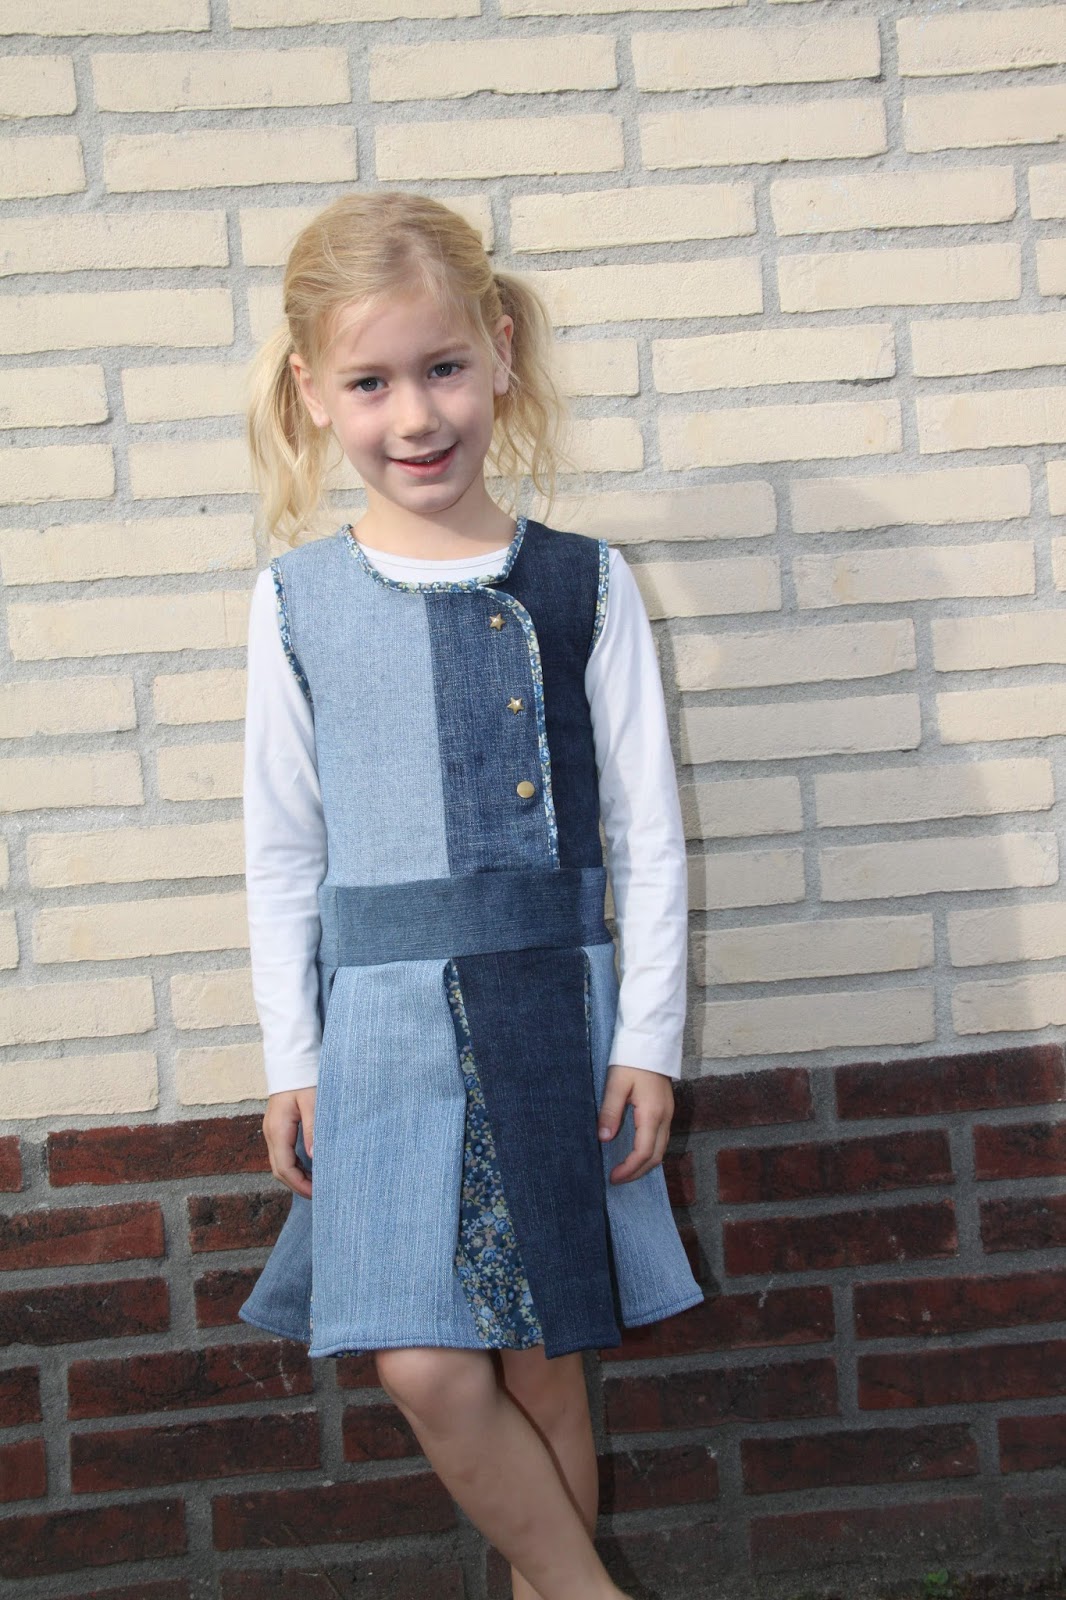
Two days before I read about the project run and play themes (denim for week three) I had cut all my old jeans in 15 cm times 30 cm rectangles! I had seen a great quilted jeans cover thought it was a great way to recycle those 20 plus jeans item that were waiting to get repurposed. After seeing the themes I was having a dillema. I was not planning to buy new (denim) fabric but liked to participate in all four weeks of project run and play. While I had been cutting the huge pile of jeans I had already noticed I had far too much for one cover, which is why I decided to take the challenge to sew up something using my rectangles.


The description of the theme gave the impression that I was allowed to use some other fabric and to dial down on the jeans look I added blue/gold flower fabric. I already owned some gold colored snaps which perfectly match the gold in the flower fabric.


I was inspired by the swing skirt of Compagnie M and and asymmetric front from No big dill. I used a bodice pattern piece I had lying around. The skirt is made of 6 jeans rectangles  and 6 flower fabric rectangles (all 15cm time 30cm) and I box pleated the skirt in such a way that the pleats are 10 cm wide. I cut some bias binding from the flower fabric using a tutorial from Melly sews.


Any good dress should stand a good twirl test. This time I finished even before the link up is open, yeah! This leaves me more than a week to make my fourth project.


Thursday, September 25, 2014

Project run and play: upcycle

This is my second contribution to project run and play. Last minute, but I finished it time! I had a trip this week and arrived home yesterday evening but managed to sew up my week two contribution this morning. I made a baby winter onesie from one of my old sweaters. I had seen a few on Pinterest already, but these always used a long sweater. The sweater I had in mind was far from long. The short length was actually the reason this sweater was on my sewing pile. Before my pregnancies the sweater fitted fine, but now it is way to short.


Therefor I had to improvise and the sleeves became the front and back. As you can see on the picture the sleeves were longer than the front and like this I just had enough length. The new sleeves I cut from the front and the back became the hood. The zipper was also recycled.

The sleeve and leg ends were the orginal ends of the sweater and did not needed finishing. The hood is finished with the old neck line. I had to cut the front in two to insert the zipper. The width of the sleeve did not allow me any extra sewing allowance. I widend the front slightly by adding some board of the original back.
The bread was a great way to make her look happy in the camera.
I did not anticipate the bread to have such an effect on the window though.

I think I will make a few more of these!


Friday, September 19, 2014

Fletcher and the Falling Leaves

As Emily pointed out to me, Naptime creations is hosting a sewing series inspired by children books. We read a lot in our house and we love books. We have tons of them but still we regularly go to the library, my kids love it there. They will keep on piling books to take home. When we get home we usually have an immediate reading session in which they prefer to read them all (which sometimes takes a lot of time indeed). My eldest learned to read last year but she still enjoys our reading sessions a lot. reading is so important for kids which is why I love this sewing theme. Books or stories determine the way we look at the world while we are kids but also as grown ups.
 
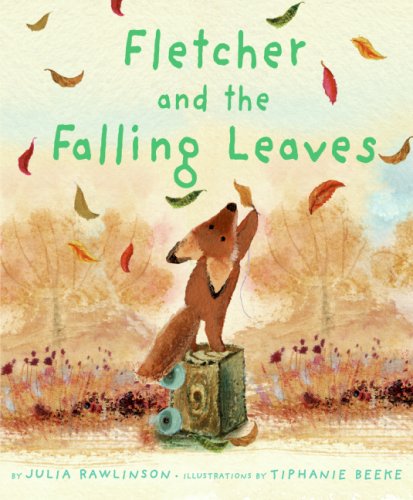
My link up is inspired by Fletcher and the Falling Leaves. If you do not know them yet, you should check out the book series of Julia Rawlinson about the adorable fox Fletcher. Fletcher experiences the four different seasons in his own way. In the fall version of the book Fletchers becomes very worried when his favorite tree is changing colors and starts to loose his leaves. The books teaches children about nature (the changing of the seasons and the circle of life) and about how change can be scary but also beautiful.


A big part of the dress is made from "fall trees" of JNY, a Swedish organic fabric designer. The trees fabric fits Julia Rawlings book very well because JNY also features this fabric in a winter and spring print (I also own a piece of the winter pint). So both the book and the fabric are really about how trees change over the seasons.


The pattern of the dress I sew my eldest is composed of several (Ottobre) patterns I made in the past. With the help of a tutorial from Kitschy Coo I created a sunset on the front of the dress. The sun is setting but is still visible which also symbolises fall. The fabric I used for the 'sunset' contains different shades of orange circles. When I saw this fabric for the first time it immediatly reminded me of sunsets, during the sunset the sun also changes color. These different colors of the sun resemble the different colors of leaves during fall. Because the dress will actually be worn in the fall I added hood and made sure it has long sleeves. My little photo bomber is there again showing of a shirt I did not blog about.


I really did my best on this dress and tried to match up the fabric near the pockets. I think she looks cute, what do you think?

Thursday, September 18, 2014

Project Run and Play: Candy Candy


This blog post contains a very familiar story (at least I have read it in multiple blogs already). I stumbled upon Project Run and Play a while ago and read through the entire archive. I was very inspired by the designs and tutorials and dreamed about sewing along. I somehow never saw a theme announcement and was amazed how people knew what to sew that quickly.

Shortly after making my resolve to more actively blog about my sewing I did come across the Run and Play announcement themes! The first theme, 80's cartoon, which apparently excited a lot of people, actually scared me of a bit. Cartoon inspired cloths but no costumes, seriously no costumes.... I understood simply copying the cloths to also be in the costume department. I went through several option in my head but nothing really inspired me. I thought of rainbows, flutter sleeves and jumpsuits (looking at what people created I see many had these associations) but the project did not get a real shape in my head.

I had kinda already given up until I saw the first sew along projects coming in and read on Peaches and Bees  that she was also struggling with the theme at first but then just thought about what she watched in the 80's. I watched Candy Candy, according to wikipedia the original Japan show was in the 70's but in the Netherlands it was on television in the 80's. I have to admit that my most clear memories of the show is the bed spread I got (and still own) and a girl crying on a boat, but looking through the pictures of the show this week I found my inspiration. I loved the idea of a red apron dress and I immediately knew how to do it.


Last December I bought the Amaryllis dress pattern, because I simply had to have it. I had had several ideas on which fabric to use for it but the dress had not been made (or printed for that matter). I thought that if I would flip the back and the front of the dress, use two colors of fabric (one for each side) and  add a faux apron front I would have a pretty good apron style dress. I used two pieces of left over fabric, a sheet and a piece of red canvas like fabric that I once bought for making  pipping (this was at the start of my sewing adventure and had no idea how much I would need and just bought way to much. The red fabric was used totally, I even had to cut the circle skirt in three piece to make it fit. The front strings of the apron turned out a bit tight to turn, those two strings took more than an hour to turn!! I did not wanted to line the dress and that combined with my own adjustments did lead to a view construction confusions, but I am done with even some time to spare! Al in all I am satisfied with the result, I added some flutter sleeves because that seemed fitting with the whole theme.

No racoons here in the Netherlands (Candy Candy's pet) so my daughters favorite plush animals had to substitute.

 The red heart button came from my stash as well, the red and white match perfectly.


I assumed correctly that this dress would have a high spin factor, while spinning the fake underskirt shows, yeah!